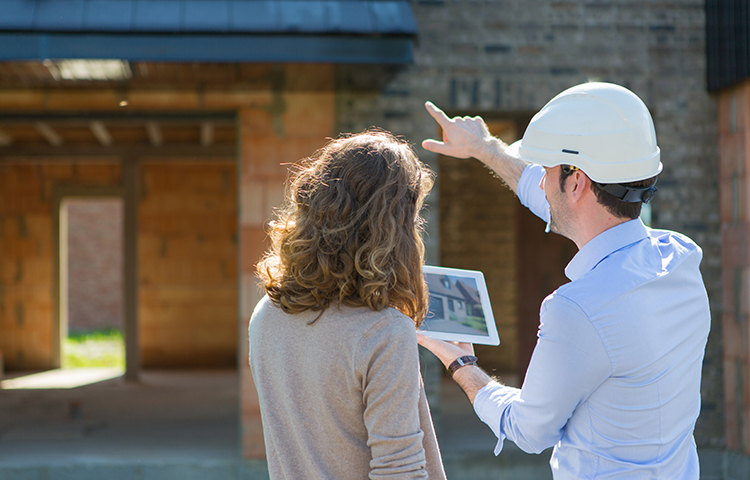
In one of our previous posts, we showed you how to successfully convert any room in your house to a fully functioning home office. One of the steps we briefly mentioned was painting the room. Now, we will tell you how to do just that like a pro!
Depending on your skill and experience level, painting a room or multiple rooms might either seem like a daunting task or a walk in the park. Either way, this step by step guide will help beginners and DIY pros alike. From preparation to professional finishing tips, here are the steps that will help you get the job done properly.
Step 1: Gather Your Supplies
These are the 10 main things you need to paint a room.
- Paint – Start off by measuring the space by calculating the total square footage. Multiply the width by the height to determine the surface area. Once you have measured all surfaces you will be painting, add the square footages for your total. When buying the paint make sure to buy enough for two coats.
- Primer – To find the correct amount of primer you need, use the same measurements for the paint but only buy enough for one coat.
- Drop Cloths – If you will be moving the furniture out of the room you will only need enough cloth to cover the floor. However, if there will be anything left in the room while painting you will need to get enough to cover it.
- Sandpaper – This is used to prepare rough surfaces on your wall and will help the application of paint.
- Paint Rollers – When looking at rollers and roller covers you will need to make sure they are the right kind for the type of paint you will be using and the surface you will be painting.
- Paint Brushes – As with the rollers, you need to make sure you get the right kind. First off, you do not want to buy a cheap brush. Purdy creates high quality, reliable brushes that are popular among professionals throughout the industry (you can find some here). We recommend having at least one 2.5 angled brush that will help with edging.
- Paint Tray – This is what you will put your paint in to dip your roller.
- Painter’s Tape – Scotch Blue painter’s tape is the best tape you can buy and the one we recommend.
- Rags – Use rags to clean your brushes.
- Sponge – Use a damp rag to clean dust and debris off your wall after sanding and prepping and before painting.
Step 2: Prepare the Room
- Remove everything from the walls: artwork, picture frames, switch plates, and anything else.
- Examine walls for any scratches, holes or dents. Fill in holes with spackling paste, and smooth the surface using sandpaper.
- Remove dust and dirt from your walls with a damp sponge.
- Line door frames, window frames, molding and any other trim in the room with painter’s tape.
- Cover your floor and furniture with the drop cloth to catch any spills or drips.
Step 3: Paint
It’s time to start painting:
- Prime
Primer helps to create a smooth base on which to apply paint to walls and ceilings. If you patch any holes, or if you’ll be painting new walls, you’ll need to apply primer. You may also need to prime if you’re changing from a dark to light color or from light to dark.
- Use an angled brush to apply the primer around the edge of the walls then use a roller to apply a single coat to the rest of the wall.
- After you apply the primer, allow it to dry thoroughly before moving on.
- Paint the Ceiling
- Always work from top to bottom as you paint.
- Use a roller to paint the ceiling.
- Finish painting the ceiling completely and allow it to dry before moving on.
- Cut In the Edges and Corners
- Coat one-third of a 2.5-inch angled brush with paint and tap off excess paint on the side of your bucket.
- Paint a 2- to 3-inch stripe along each corner and along the ceiling and molding. This band will serve as a safety net to keep the roller from bumping against other areas.
- Keep a “wet edge” by only cutting in far enough that you can then easily use a roller to blend the transition to the rest of the wall.
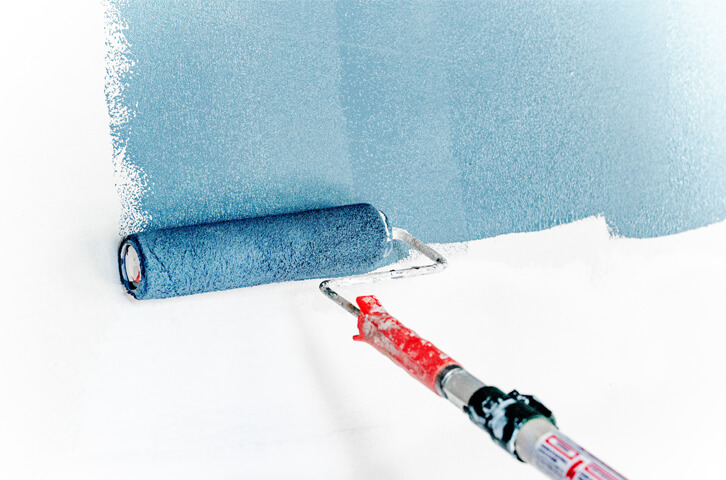
- Use a Roller on the Walls
- After you’ve outlined the corners and edges with a smaller brush, you can fill in the rest with a roller.
- Fill the tray with just enough paint to reach the grate.
- Dip your roller into the tray and cover it completely with paint. Then roll it over the tray’s grate to be sure the paint is distributed evenly and excess paint is removed.
- Use the roller to paint a W or M shape on the wall. Once you’ve distributed most of the paint from the roller onto the wall, use vertical strokes to spread the paint evenly.
- Repeat this vertical motion until the wall is covered. Go back over portions of the cut-in edges to blend in any visible brush marks.
- If you need to take a break stop in a corner. This may help avoid a line or edge of paint in the middle of the wall that is visible once the wall is dry.
- Paint the Trim
- Wait until the walls are dry, then carefully peel the tape from the trim.
- Use a wide, straight-edged brush to paint broader moldings.
- Use a small, angled sash brush (1- to 2-inch) to finish by carefully painting a straight line along the edge.
- Once the trim is dry, you’ll have successfully painted your room.